
Today I finished the boxes I plan to give to a very dear friend for her 30st birthday. As usual the wrapping is planned out before the content…Now I really need to find something to put inside my boxes…any recommendations?
I love doing those boxes and have used them in the past to make jewellery presents or store my own jewellery. Here are some photos from my past DIY box projects:


Okay, so what do you need?
- fabric with a pattern of your choice. Easiest to work with is a very thin version of 100% cotton
- wooden box (the lid should be rather loose since fabric and paper
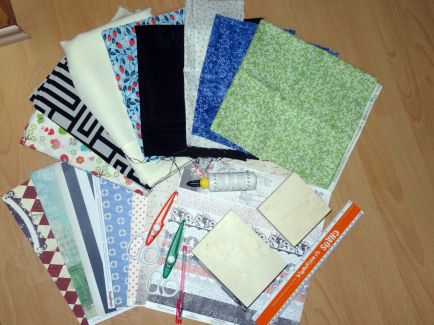
will be added)
- normal scissors, nail scissors, optional pattern scissors
- robust colourful paper, e.g. scrapbooking paper
- a small old brush
- paper-clips to fix freshly glued edges
- quick drying all purpose glue (should be transparent after drying)
- needle and thread
- decorating material: buttons, ribbon etc.
1. Cut out a generously measured piece of fabric big enough to cover the box or the lid respectively
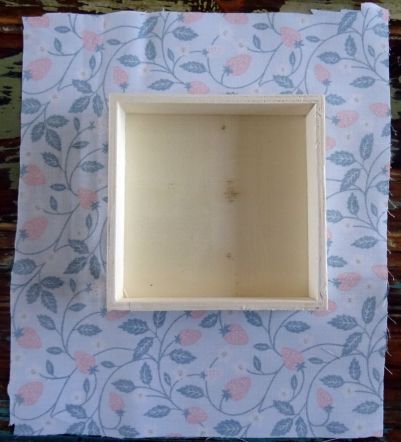
2. Using the brush, apply a thin layer of glue to the back of the box/lid. Carefully press the fabric on the wood. Smooth out any wrinkled areas with your fingers. Let dry. Make sure that the corners are properly glued, otherwise improve your work.
3. Add glue to the sides of the box/lid. Press down the fabric, again smooting out all wrinkles. It is vital to glue out the corners properly. Do not cut the fabric yet. Let dry completely.
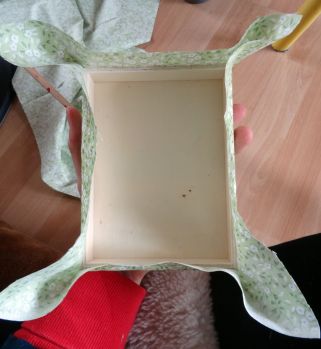
4. Use the nail scissors to carefully cut down the corners of the box. If you used good glue and covered everything, you should end up with a nice clean result.


5. Roughly Cut 45° angles in the overlapping fabric of each side. Add glue and fold the fabric down into the box. Firmly press and stretch out the fabric over the edge of the box. Otherwise it will be tricky to close the box later. Fix the fabric with a paper-clip until the glue has dried.


6. To decorate the inside, take the inside measures of lid and box. The boxes I got are all not perfectly rectangular and even so that I decided not to cut out the inside decoration in one foldable piece, but each side individually. This also leaves me more freedom in arranging different patterns of the scrapbooking paper. Make sure to draw and measure on the backside of the paper-you don`t want any ugly lines to show later. When you measure the sides leave some excess paper to cut down with a pattern scissor to create a nice finish.


5. If you´re a purist- congratulations, you`re done! If you love additional decorations like me, now the fun starts. I added some fabric flowers that can be “sewn” within 2 minutes. I followed this tutorial to do them.


To finish the box, I glued some lace around the lid and used a nice button to complete my fabric flowers. I might add a quote and another button to the inside of the lid.
So here, dear readers the results. This is what my friend will get (filled of course).


So, leave me a comment and tell me how you like my DIY and what you´d put inside those beauties.
